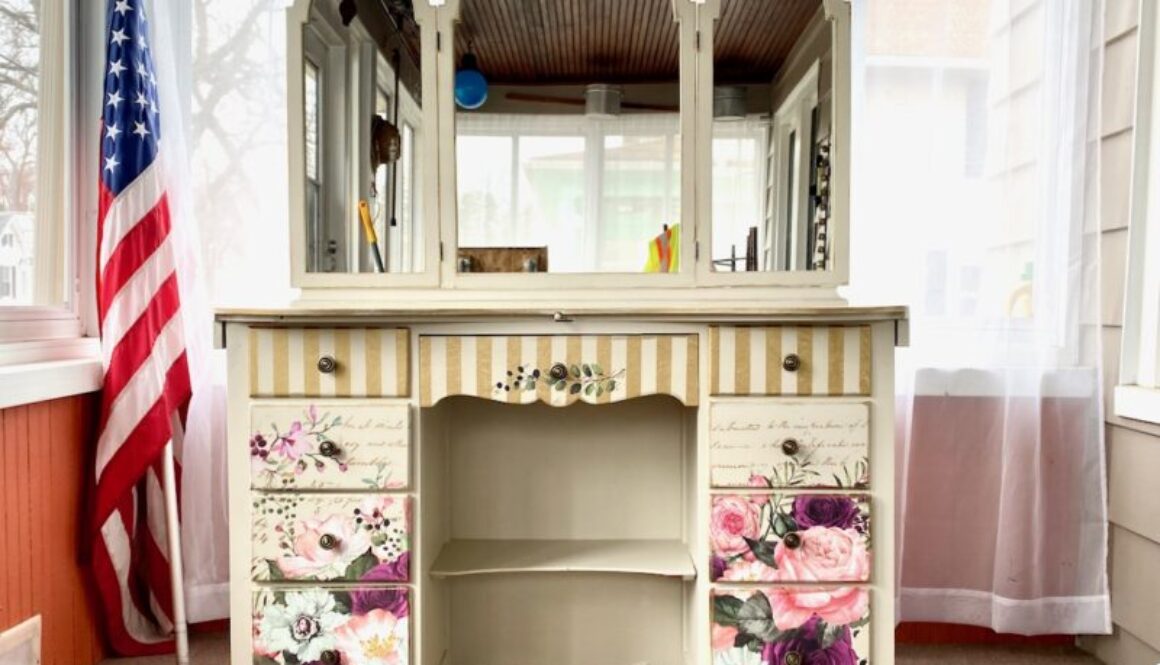
In a dank dark garage with many other misfit mistreated castaways, it was her 3-paneled floral etch mirror that made me stop, look and listen. Had I not decided to violate one of my own furniture purchase rules, who knows where she’d be now. Would someone else have took and loved her? So she made me stop and vote for her features and ignore her many flaws. Chipped veneer all over her face like acne on a teenager and gouged raw wood top from a previous attempt to remove veneer nearly overwhelmed my willingness. Can you believe, without as much energy as I thought, she was transformed in to a Victorian Princess, extremely on-trend for today’s shabby chic white farmhouse style.
Before - But With Hope
New Trick - Oven Cleaner!
Removes old finish FAST
Brilliant, easy, fast and inexpensive. That’s how I would describe my new makeover tool for removing old finish. In a conversation with Angie, owner of Vintage One Eleven in Brooklyn, MI, we said that we love the new bare wood (nude) legs on furniture trend. Haven’t you heard to use Easy Off Oven Cleaner? I had not! It’s fantastic. No waiting but maybe 10 minutes or so then scrub off old finish down to the raw wood. But if you are going to try it, PLEASE USE GLOVES!
Wood Filler
ProActiv but for Wood
An Amazing Transformation Reveal
Where To See Her
For Sale
SALE PENDING Only $395 – inside Vintage Venue, 174 W Maple Street, Mason MI
“Scandinavian design is characterized by a minimal, clean approach that seeks to combine functionality with beauty. Its focus is on simple lines and light spaces, devoid of clutter”, so says the Scandinavia Standard. Norway, Sweden, Denmark, to name a few countries, is where minimalism was born and what Steve Jobs made popular in the West. It is also very expensive to buy authentic pieces but for the likes of Ikea. But before you do that, try making over an old Mid-Century Modern pieces from the thrift store.
Top Drawer sanded and bleached
What To Look For
Old American MCM furniture are the perfect pieces to makeover into Scandinavian Design. MCM is: “simple, functional wooden pieces made from teak and curved designs”, according to The Spruce. “Unlike frillier pieces or those filled with ornate detailing, mid-century modern furniture is much more straightforward in nature. “The need and desire for functional, simplistic furniture and decor in our homes was a rebellion against the ornate traditions from decades before, and a way for families to embrace a more modern, organic way of living,” designer Eleanor Trepte comments. Popularity of minimalism has grown since the pandemic. History is repeating.
How to Flip It For Today’s Style
Taking an old beat up MCM dresser for today’s light and airy style trend involves using some creative planning. Makeovers are not 100% paint jobs. The best makeovers save some wood element if at all possible, even if it’s just the legs. That is why the one in the above picture especially caught my eye at Goodwill. The backing disintegrated and the edges were chipped to heck, but there still remained great quality wood drawers.
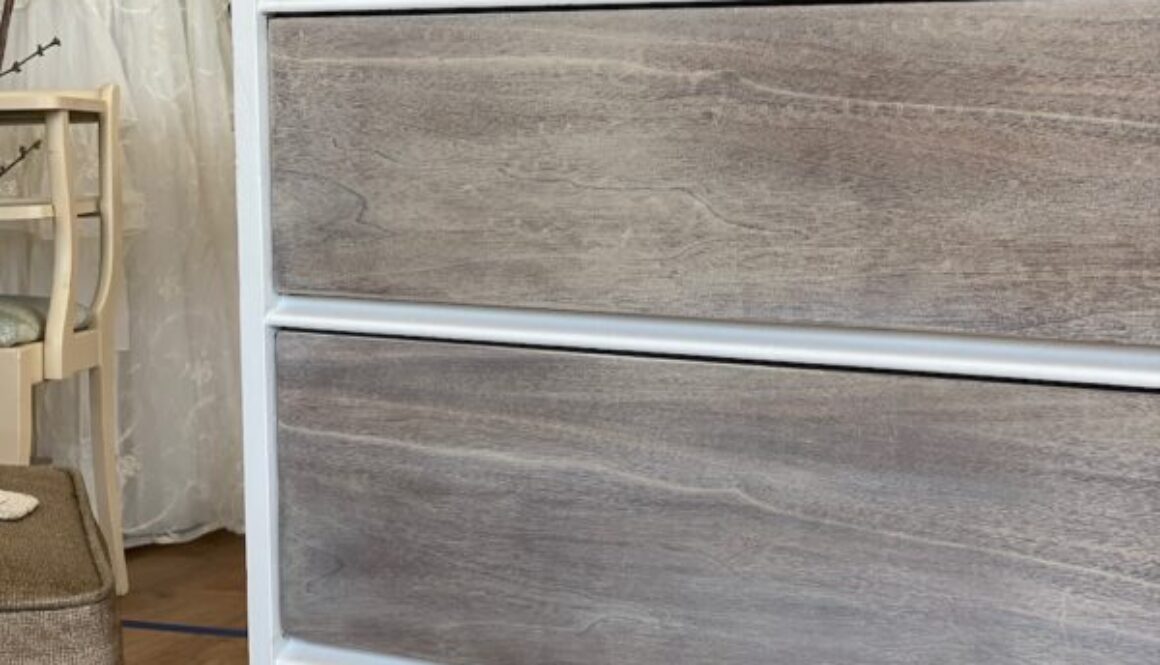
The body is painted true crisp white with chalk paint, (my personal DIY recipe). The drawers are sanded down to raw wood then bleached using standard Clorox concentrate. It took only one application of white wood stain, ordinary MinWax from Home Depot, to reduce some contrast and lighten adequately.
Brush on bleach, cover with plastic wrap let sit at least 3 hours
I would say now that I’ve finished this project, the bleach was optional. It took some orange/red tones out which was helpful to avoid a pinky cast to it, maybe, but it didn’t lighten the color of the wood as much as I thought it wood (LOL). It actually turned out to look to be on the grayscale. I didn’t predict that either.
A true Scandinavian piece might run into the high hundreds or so, depending on size. An IKEA piece might be saving some money but then you have to assemble it and it’s brand new. An MCM thrift store makeover is perfect for today’s re-use lifestyle and the dollar spend is under $100!!
Where to Buy
$295
If you live in the lower portion down state Michigan area, find this inside Vintage Venue, 174 N. Maple Street, Mason MI. Open 7 days a week 11-6 but longer on Thursdays until 8pm and until 5pm Sundays.
Tammy remembers her Mom sitting at the vanity doing what Mom’s do. Hair, makeup, earrings. As little girls, we watch in anticipation of doing these things ourselves as evidence of becoming a woman. So, what to do now that the years have flown by, the parents’ house needs cleared. The vanity that once was beautiful, promising and, holds so many memories is beat up, kind of ugly and, there is no way you part with it. You don’t have to thrift, sell or, otherwise rid yourself of a precious albeit ugly family treasure. Do what Tammie did. She re-designed it to fit her style and called me to make it happen.
BEFORE
This piece is 1980 gorgeous with professional hand painted floral and ivy design. The mirror had broken off making it even more tempting to part ways with it. But we persevered. The challenge for me as the re-painter is that it is a re-paint job. The floral and ivy was applied by hand. You could feel the flow of the paint with your finger, up and down where the flowers lie and at their edges. Same with the vine and leaves. We had to accept that the re-paint job wouldn’t be as smooth as a fresh paint job.
The Mission: Makeover Mom’s Vanity to Match in Tammie’s Bathroom.
We were working with a French chic shower curtain, French chic wallpaper border, tan tiles and beige walls.
I was given designers license to choose the base color for re-painting, an invitation to use those transfer decal things and to add any other embellishment I thought necessary. Tammy and I texted a few transfer options and settled on Violet Hill from Re-design with Prima.
AFTER
Here’s what a little elbow grease and some fine materials will do. Who wouldn’t feel extra special pulling into this beauty for their own bit of pampering. Mom would be proud.
MATERIALS USED:
Cleaning and Prep: Krud Kutter cleaner and sandpaper
Paint and Topcoat: Temporal Spirit by Benjamin Moore DIY Chalk Paint and General Finishes High Performance Flat
Embellishments: ReDesign With Prima Violet Hills Transfer, Gold metallic acrylic and Frog Tape for the stripes; Rub N Buff Gold for edge antiquing.
HAVE AN UGLY HEIRLOOM?
If you have an antique vanity stuck in the garage that has seen better days, don’t despair! With a little bit of time and effort, we can make into new glory. Contact me, like Tammie did to start a conversation.
My favorite paint projects are the ones with a little challenge and a lot of heart – Kelly
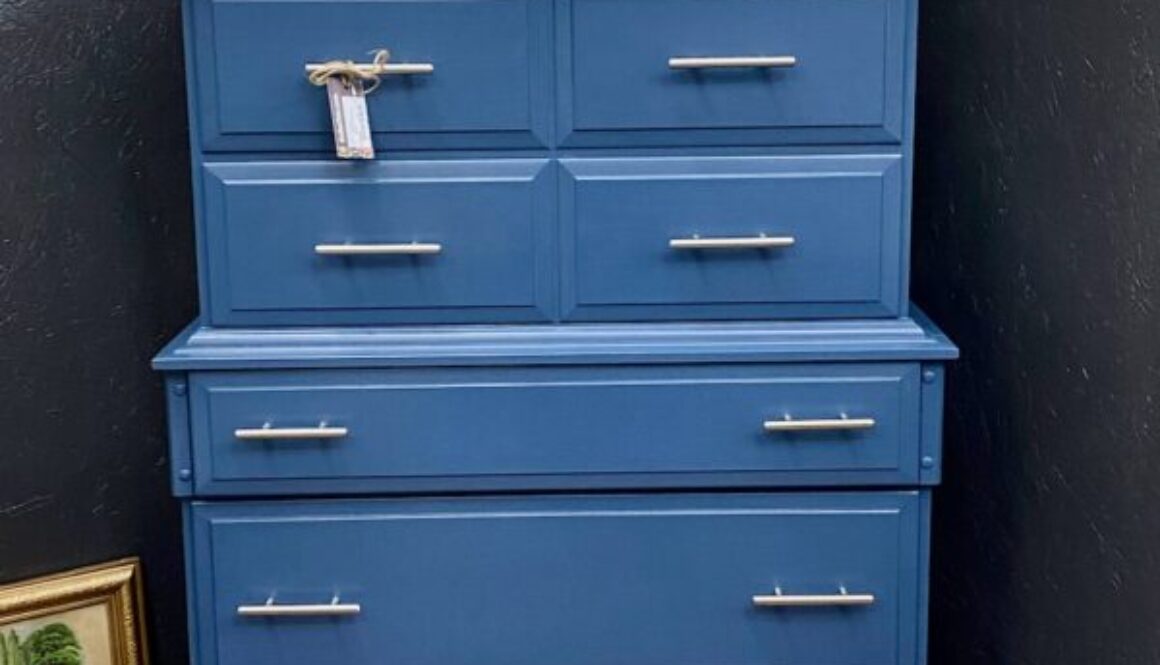
My latest trend is going simple with a lean towards mid-century modern if possible. I’m eyeing later period pieces to purchase, especially those higher end maple pieces when I can find them. The thing is, those pieces are robust, built to withstand a beating! The furniture that I re-do (and can only pieces I can afford) are beat up ugly ones. Once in a while I get lucky to find an affordable sharp no frills gem of a dresser like this one.
Before & After
Color and Hardware Design Elements
The color had to be intriguing, not neutral, to make this a fitting contemporary piece. Since I make my own chalk paint, (a recipe I’ve been developing for years), I am uniquely sourced with any color on the planet to choose. I chose Sea Serpent from Sherwin Williams. Not sure why they call it neutral . . . I call it navy with a bit of excitement.
The bar pull hardware was an easy choice from my local Menards. Gold is often used to coordinate with navy. To me that combination comes off a bit civil war military-ish looking. So I phoned a friend to concur . . . my niece Sarah 2000 miles away. Yep, we agreed, silver looks and feels a bit less flashy and gaudy more pleasant and classy. I hope you agree. Believe it or not, a lot of consideration goes into these makeover choices. Distress or not? Apply a transfer or not? The good news is that grays are off my list of color choices, unless it’s super soft light gray.
All of my pieces are durability primed and finished using General Finishes High Performance Topcoat. This one is Flat Sheen – not shiny.
For Sale
$268 and can be seen at Timeless Treasures in Mason MI – Open 7-days 11am to 6pm.
These solid wood sturdy dressers from the 60’s are the best for an updated makeover and especially this one with it’s unique drawer configuration.
Raised Stencil Technique Lesson Learned
I thought the stencil design across the top 4 drawers was the perfect solution for adding a trendy design. Ideally, the plan should have worked perfectly, except if it weren’t for having chosen black paint. What I learned — raised stencil works much better against lighter paint colors. Paper clay details are much more showy when using dark paint colors.
The problem? Stencil appearance is a factor of lighting. Sometimes the design is visible, sometimes it’s not. It’s a cool feature none the less.
Buy Me
SOLD! $220 located at Timeless Treasures of Mason; 525 N. Cedar Street, Mason MI Open 7-days 11am to 6pm
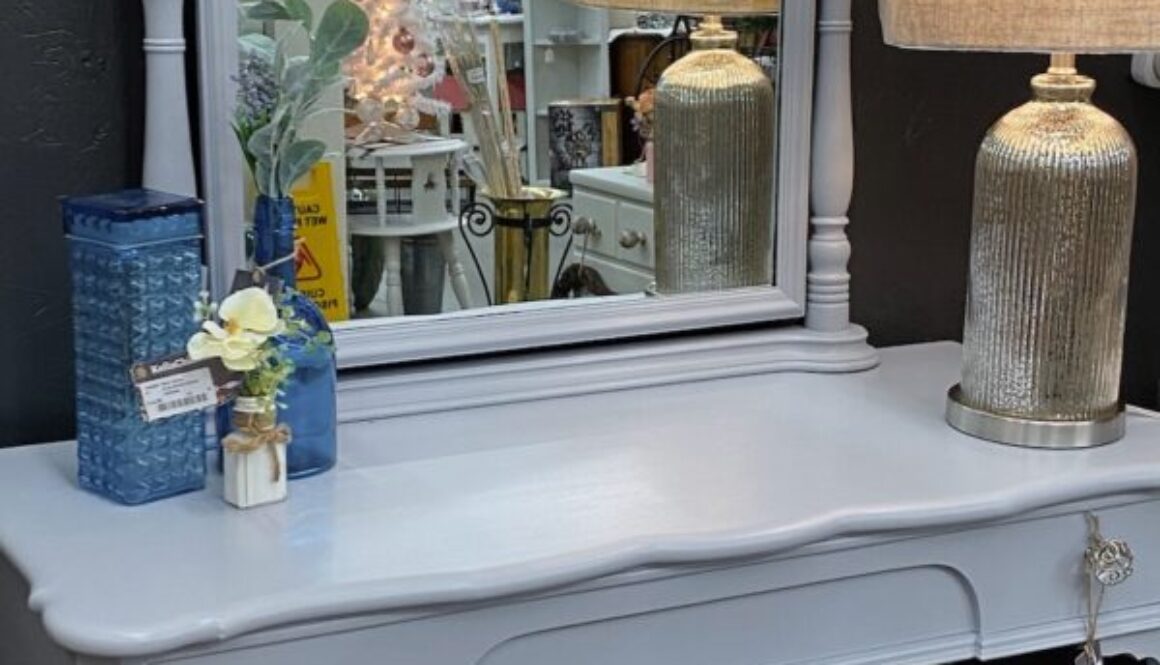
See a dirty antique, web caked, weathered piece from decades of storage in a rural Mason barn come back to life. I found her in an estate sale. Only a fellow painter would have noticed her potential! Frankly, that the mirror is near perfect is truly amazing!
She now has decades of modern use to come as a gorgeious cosmetic vanity or entryway table. In my excitement to make this transformation, I missed the before picture.
Paper clay is an artists best friend. Adding the flora details on mirror header really does a trick to give it girl glam.
The bench is re-covered with extra cushy seat and textured denim color fabric.
How to Buy
$230 located inside Timeless Treasures, 525 N. Cedar St., Mason MI. Open 7-Days a week 11-6.
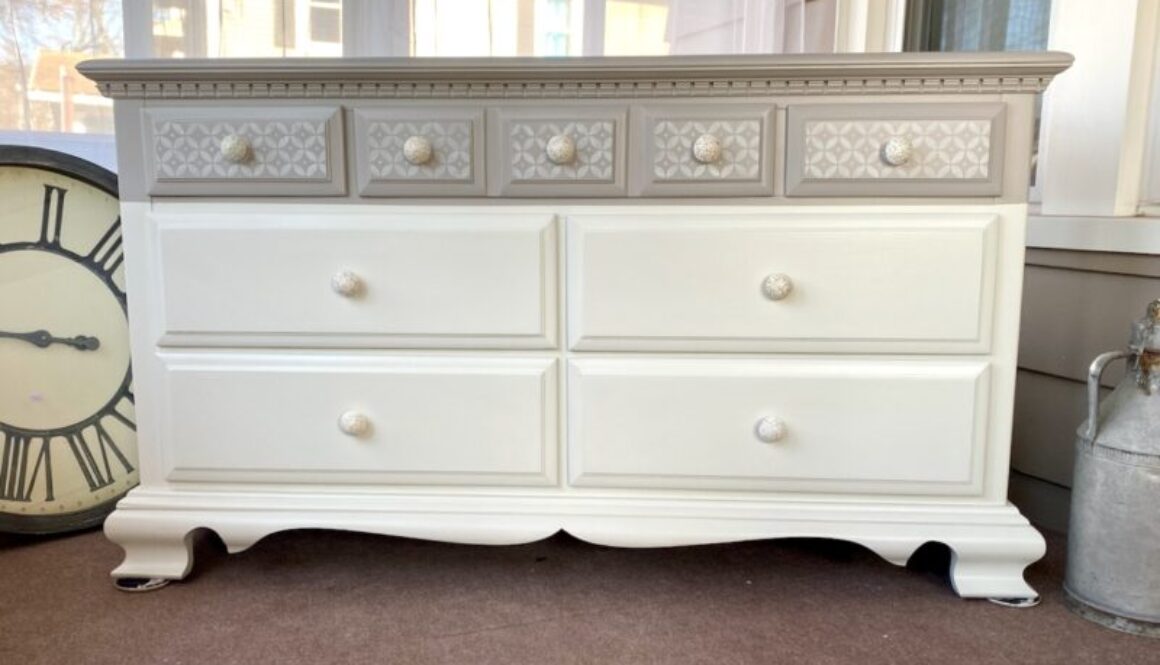
The two-color painted furniture style is a simple solution for the modern dresser pick-me-up. It seems to look best on pieces with mostly linear architecture. I wouldn’t use a two-color style on an antique frilly piece having lots of details and curves. It wouldn’t fit right, I don’t think. But this piece, with the toothy strip just under the top and open canvas is perfect.
Before Makeover
Many thanks to those brave designers that dare to to experiment and share their inspiration like Do Dodson Designs and Salvaged Inspirations. Both have an eye for designing with a touch of flare but not overwhelmingly elaborate.
The stencil on the top drawers fit perfectly in both style and size! Funny, it’s the first time I used it since buying it at a thrift store years ago! Love it with that happens.
Here’s What I Used
PREP PRODUCTS
Clean with LA Totally Awesome Cleaner from ACE Hardware to cut through grease and wax then prime using Kilz Oil Based Primer. It’s odor is strong for when in use and about an hour while drying, it’s the best least expensive one coat tannin blocker you can buy, also from ACE Hardware. 20 old bat wing hardware holes were filled in the production of this make-over!
PAINT PRODUCT
Chalk Paint KellaChic Proprietary Recipe using (only) Sherwin Williams base paint in Pussywillow gray and Natural Choice white. Pairing these colors produced a warm yummy ambience fit for any color bedroom or as a dining room buffet really. Frog Tape produces the best paint lines, placed between the top lingerie drawers and the bottom clothing drawers. New cast iron white distressed knob hardware from good ol’ Hobby Lobby to fit exactly the same 1 1/2″ diameter of the stencil design.
TOP COAT
General Finishes High Performance Top Coat Flat Sheen is my go to brand for the best, not only for it’s durability but for the way it goes on. I use the sponge on method.
The first Antique Coral Victorian Dresser was so fun to create I did it again. When any Victorian dresser comes my way again, she will likely get the same treatment: decoupage inside architectural frame of drawers, carnival stripes somewhere, cool chic hardware and embellished keyholes and knob back plates.
I regret that I didn’t get a Before picture. She was a hot mess! Veneer missing all over the drawers, some removed completely. There were many thoughts to just chuck her to the curb rather than take the enormous prep time needed to paint. Her spindle legs made her very hard to resist so I negotiated. If I do a little at time, in between other projects, maybe prep wouldn’t be so much a pain. That what I did and it wasn’t that bad after all!
Improved Decoupage Technique
The 2 drawers that butt together were painted together as one piece. Blending, white on the inside and coral on the outside, offers dimension under the floral tissue paper. This was a new way that I’ll adopt as a basic plan whenever I decoupage again. Nice, huh?
Used for this Make Over:
Almost all of my pieces start with cleaning and oil-based Primer before painting.
My house is filled with white distressed. It goes with everything no matter what gets changed or swapped out – accent pieces, wall color or comforters. When I get a chance for a super good wood reveal, I go for a heavy distress.
Cute dresser perfectly sized for any room, large or small made from solid wood. Look at me now!